Posts filed under ‘Recipes’
A must try: Chocolate Peanut Butter Cupcakes
I know I haven’t been too regularly over the past year with blogging, but I wanted to share this awesome recipe with you all!! These were INCREDIBLE!!! Very rich and very delicious. Enjoy 🙂 Let me know how they turn out!
Ingredients for cupcakes:
– 1 package chocolate cake mix
– 1 1/4 cups water
– 1/3 cup canola oil
– 1/2 cup peanut butter
– 3 eggs
– 24 miniature peanut butter cups
Ingredients for frosting:
– 6 ounces of semisweet chocolate, chopped (I just chopped up chocolate chips)
– 2/3 cup heavy whipping cream
– 1/3 cup peanut butter
– Additional miniature peanut butter cups, chopped
Instructions:
1. In a large bowl, combine the cake mix, water, peanut butter, oil, and eggs, beat on low speed for 30 seconds. Beat on medium for 2 min or until smooth.
2. Fill paper-lined muffin cups 1/2 way. Place a peanut butter cup in the center of each cupcake. Cover each with 1 tablespoonful batter.
3. Back at 350 degrees for 18-22 minutes or until toothpick is inserted near the center corners out clean. Cool for 10 minutes before remove from pan to wire racks to cool completely.
4. Place chopped chocolate in a small bowl. In a small saucepan ring cream just to a boil. Pour cream over chocolate; whisk until smooth. Stir in peanut butter. Cool, stirring occasionally, to room temperature or until ganache reaches a spreading consistency, about 10 minutes.
** (Mine was really runny, so I had to stick in it in the fridge for about 15-20 min!)
5. Spread over cupcakes, immediately sprinkle with additional peanut butter cups. Let stand, until set!
** Best not to use reduced-fat or generic brands of peanut better!
A Cupcake Cake!!
I know this post is a bit belated, but nonetheless, I got it posted!!
Over the Orthodox Christmas holiday, a friend and I decided to take on the challenge of decorating a cake. I gotta tell you, I did not think I had this in me! Who ever knew I was this creative/”artistic?”
For starters we made red velvet cupcakes. I’m not going to lie, they came from a box…
After letting the cupcakes sit overnight, so that they were completely cool we made a cream cheese icing, from scratch! We got the recipe from allrecipes.com. However, we did tweek it slightly. We read many of the reviews and found that the icing really did taste like cream cheese, and we were looking for a sweeter icing. Problem solved, we added almost 2 more cups of powdered sugar! Many people don’t want to make their own icing because it sounds scary (that used to be me!), but this was easier than making the cupcakes themselves! Honestly, try it!
Ingredients
- 2 (8 ounce) packages cream cheese, softened
- 1/2 cup butter, softened
- 2 cups sifted confectioners’ sugar
- 1 teaspoon vanilla extract
Directions
- In a medium bowl, cream together the cream cheese and butter until creamy. Mix in the vanilla, then gradually stir in the confectioners’ sugar. Store in the refrigerator after use
Now it was time for the fun stuff! We put the cupcakes into the shape of a christmas tree! (Angela’s brilliant idea!) We then started the decorating!!
- Tree: Green food coloring
- Stump: Brown food coloring
- Ornaments: M&M’s and sprinkles
- Snow: Coconut
Our final product:
It tasted as delicious as it looks! I was so surprised at how easy this was. Not to mention, we had a great time decorating it! I can’t wait to make my next one 🙂 Yes, i’ve already decided what it will be: A large toothbrush with a piece of thoothpaste on it! How cute of an idea is that for a dental school event? Totally cute.
Sugar Cookies
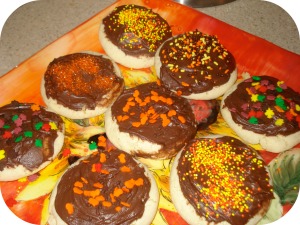 I have a delicious new sugar cookie recipe to share!! This turned out to be a fantabulous recipe from allrecipes.com. Definitely recommended! Enjoy 🙂
Ingredients
- 2 3/4 cups all-purpose flour
- 1 teaspoon baking soda
- 1/2 teaspoon baking powder
- 1 cup butter, softened
- 1 1/2 cups white sugar
- 1 egg
- 1 teaspoon vanilla extract
Directions
- Preheat oven to 375 degrees F. In a small bowl, stir together flour, baking soda, and baking powder. Set aside.
- In a large bowl, cream together the butter and sugar until smooth. Beat in egg and vanilla. Gradually blend in the dry ingredients. Roll rounded teaspoonfuls of dough into balls, and place onto ungreased cookie sheets.
- Bake 8 to 10 minutes in the preheated oven, or until golden. Let stand on cookie sheet two minutes before removing to cool on wire racks.
Coconut Macaroons
The baking continues. If you like coconut, you will LOVE this recipe! I am usually not crazy about coconut macaroons, but these turned out delicious! I initially made these for my dad (they’re his favorite), the recipe made about 20 and they were gone within 2 days…the entire family inhaled them!
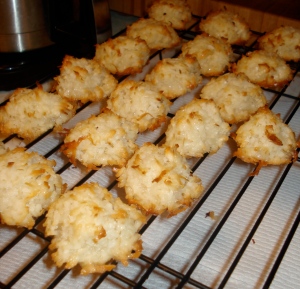
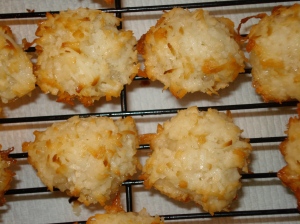
Fact: Coconut macaroons are a traditional passover dessert! (<– Just learned that!)
Coconut Macaroons
3 Cups flacked sweetened coconut
3/4 Cup sugar
4 Large egg whites
1 Teaspoon vanilla extract
1/8 Teaspoon almond extract
1. Preheat oven to 325. Line two cookie sheets with parchment or foil.
2. In large bowl, stir coconut, sugar, egg whites salt, vanilla, and almond extract until well combined. (The batter looks a little strange because there is no flour, but just go with it)
3. Drop batter by rounded teaspoons, 1 inch apart, on prepared cookie sheets. Bake until set and lightly golden, about 25 minutes, rotating cookie sheets between upper and lower oven racks halfway through baking. Cool 2 minute on cookie sheets; with wide metal spatula, transfer cookies to wire racks to cool completely.
Nutrition facts: (I’m only including these because they won’t depress you)
About 41 calories per cookie, 1g protein, 6g carbs, 2g total fat, 0 mg cholesterol, 32 mg sodium.
Sweet Success!!
I have been in super-hyper baking mode lately and I MUST share with all of you my latest and greatest accomplishment! Ready? I successfully baked my first two layer cake! I say successfully, because I have attempted to bake a two layer cake 4-5 time prior to this attempt and failed miserably each time. I must say I learned A LOT! I think the most important thing I learned is patience. It’s apparently very important to allow your cake to COMPLETELY cool (which may take an hour or longer) before trying to put it all together. In the past I always got anxious and tried to ice the cake before it was completely cooled off… as a result I would have two layers of crumbled cake sweet stuff.
So not only was I successful at putting this cake together, it also tasted DELICIOUS. The end result: A chocolate buttermilk cake with chocolate buttermilk icing = heavenly. I would definitely recommend this recipe to anyone! 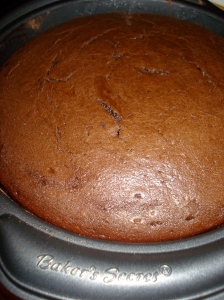
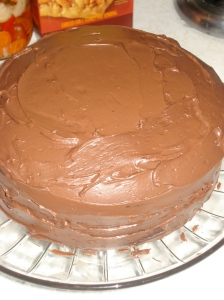
Chocolate Buttermilk Cake
2 cups flour
1 cup unsweetened cocoa
1 1/2 teaspoon baking soda
Salt
1 1/2 cups buttermilk (Maybe a little extra for more moisture!)
2 teaspoons vanilla extract
1 3/4 cups granulated sugar
3/4 cup butter or margarine (1 1/2 sticks)
3 large eggs
Choice of frosting
1. Preheat oven to 350 F. Grease two 9-inch round cake pans. Line bottoms of pans with waxed paper. Grease waxed paper; dust with cocoa shaking out excess. (This is an important step! Your cakes will come out of the pan so smoothly – and in one piece 🙂 I just learned this trick!)
2. On sheet of waxed paper (I used a bowl) combine flour, cocoa, baking soda, and 3/4 teaspoon salt. In 2-cup liquid measuring cup, mix buttermilk and vanilla; set aside.
3. In large bowl, with mixer on low speed, beat sugar and butter until blended. Increase speed to high; beat 3 minutes or until creamy, occasionally scraping bowl bowl with spatula. Reduce speed to low; add eggs, 1 at a time, beating well after each addition.
4. Beat in flour mixture alternately with buttermilk mixture just until blended, beginning and ending with flour mixture, scraping bowl ocassionally.
5. Pour batter into prepared pans. Bake until toothpick inserted in center of cake comes out clean, 30-35 minutes. Cool pans on wire rack 10 minutes. Invert cakes onto racks to cool completely. Carefully remove and discard waxed paper.
7. Assemble cake: Place 1 cake layer rounded side down on cake plate. With narrow metal spatula spread 2/3 cup frosting over layer. Top with second layer, rounded side up. Spread remaining frosting over side and top of cake.
Chocolate Chocolate Chip Cookies
5 -star recipe!!! These cookies turned out so so delicious I just had to share the recipe! 🙂 Enjoy!
Ingredients
- 2 1/4 cups flour
- 1 teaspoon salt
- 1 teaspoon baking soda
- 2 sticks butter, softened
- 1 cup granulated sugar
- 1 cup packed brown sugar
- 2 large eggs, beaten
- 1 tablespoon vanilla
- 1/2 cup unsweetened cocoa
- 2 cups chocolate chips, 2 Hershey’s chocolate bars chopped or M&M’S
- 1 cup chopped walnuts (optional)
Directions
Preheat oven to 375 degrees. In a bowl stir together flour, salt, and baking soda. In another large bowl stir together butter, both sugars, eggs, vanilla and cocoa. Gradually stir flour mixture into butter mixture and mix until combined. Stir chocolate chips and walnuts, if using, and stir to distribute evenly.
For cookies: Drop dough by tablespoonfuls onto greased baking sheets and bake about 10 minutes. Cool on a baking rack.
For bars: Pat dough into a greased 9 inch square baking pan and bake 20 to 25 minutes. Cut into squares when cooled
GO BAKE THESE RIGHT NOW!!


